Watching Netflix can be a seamless experience—until commercials interrupt the flow. For users with Netflix’s ad-supported plans, playback may pause when inactivity is detected during ads, causing frustration. This guide explores practical ways to keep your Netflix Chrome tab playing during commercials using tools, settings adjustments, and manual techniques. Let’s ensure your viewing remains uninterrupted.
What Are Netflix Commercials?

Netflix introduced ad-supported plans to provide a budget-friendly subscription option. These commercials appear during specific intervals in movies and shows, similar to traditional TV ads. However, unlike ad-free plans, this tier monitors user activity. If inactivity is detected—such as no mouse movement or tab switching—playback may pause.
The key to uninterrupted playback lies in understanding how Netflix’s systems interact with your browser.
Why Does Netflix Pause Playback During Commercials?
Netflix uses an inactivity detection mechanism to ensure ads are being viewed. Here’s how it works and why playback may stop:
- Inactivity on Browser Tabs: When no activity is detected, Netflix assumes the user isn’t watching and pauses playback.
- Tab Switching or Minimization: Moving away from the Netflix tab can trigger pauses.
- System Settings: Power-saving features or tab-sleep policies in browsers like Chrome can stop playback.
By addressing these factors, you can prevent interruptions and enjoy smoother viewing.
Chrome Extensions to Keep Netflix Playing

For those comfortable with third-party tools, Chrome extensions can help ensure uninterrupted playback during Netflix commercials. Here are four effective options:
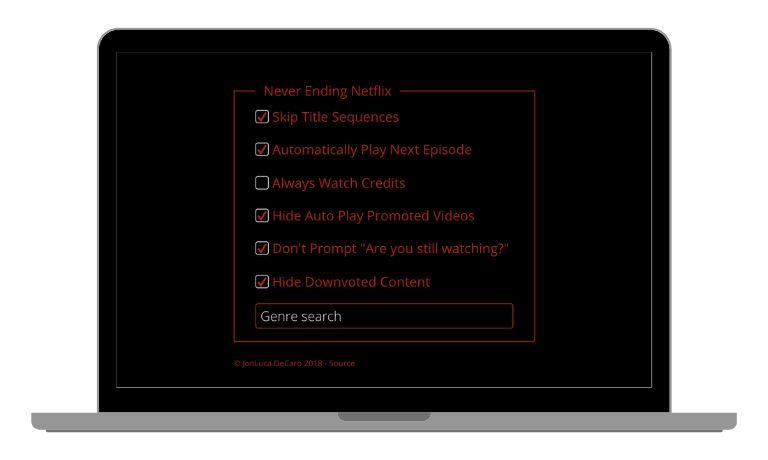
- Netflix AutoPlay: Automatically skips commercials and keeps playback active.
- StreamFix: Simulates user activity to prevent Netflix from detecting inactivity.
- Tab Reloader: Refreshes the Netflix tab at set intervals, mimicking user presence.
- StayAwake: Prevents Chrome tabs from going into sleep mode, ensuring continuous playback.
You can also install a browser extension that will block all commercials in general, not only for Netflix. Although many website owners have already learned how to bypass adblock detection, there are ways to watch anything you want (including Netflix), uninterrupted.
How to Install an Extension
Follow these steps to install a Chrome extension:
- Open the Chrome Web Store and search for the desired extension (e.g., Netflix AutoPlay, StreamFix).
- Click on the “Add to Chrome” button for the chosen extension.
- Confirm installation by selecting “Add Extension” in the pop-up.
- Enable the extension and configure any settings as needed.
Important Note: Always check user reviews and permissions for extensions to ensure they are secure and reliable.
Adjusting Chrome and System Settings
If you prefer not to use third-party tools, you can modify Chrome and system settings to keep Netflix playing:
1. Prevent Tab Sleeping in Chrome
Chrome’s energy-saving feature can pause inactive tabs to save resources, which may cause Netflix playback to stop. To disable this feature:
- Open Chrome and type chrome://settings/ in the address bar.
- Scroll down to System and locate the “Save power with Sleeping Tabs” option.
- Toggle the setting off to prevent tabs from entering sleep mode.
By doing this, you ensure the Netflix tab remains active, even if you’re multitasking in other tabs.
2. Use Power-Saving Overrides
Power-saving settings on your device can interfere with continuous streaming by reducing background activity. To adjust these settings:
On Windows:
- Open the Control Panel and navigate to Power Options.
- Select the High Performance power plan to keep the system fully active.
On macOS:
- Go to System Preferences and open Energy Saver.
- Ensure that the option to allow background activity for Chrome is enabled.
These overrides prevent your system from pausing Netflix playback when commercials or inactivity occur.
3. Enable Hardware Acceleration
Hardware acceleration allows Chrome to use your computer’s GPU for intensive tasks, reducing playback lags and interruptions. Here’s how to enable it:
- Open Chrome and type chrome://settings/ in the address bar.
- Scroll down to Advanced and select the System section.
- Toggle on the option Use hardware acceleration when available.
This setting ensures smoother performance while watching Netflix, even during commercials or when multitasking.
4. Adjust Screen Timeout Settings
Your device’s screen timeout setting might be cutting off activity during commercials. Adjusting these settings ensures uninterrupted streaming.
For Windows:
- Open the Settings app and navigate to System > Power & Sleep.
- Under “Screen,” set a longer timeout duration for both battery and plugged-in modes.
For macOS:
- Go to System Preferences > Battery.
- Increase the “Turn display off after” setting for both battery and power adapter modes.
These changes keep your screen and system awake, reducing the chances of Netflix pausing unexpectedly.
Manual Workarounds Without Extensions
For users who prefer not to modify settings or install tools, here are some manual methods:
- Simulate Activity with Mouse Movements: Keep your mouse moving slightly over the tab while ads play.
- Keyboard Shortcuts: Press keys like the spacebar periodically to mimic activity.
- Picture-in-Picture (PiP) Mode:
- Right-click on the Netflix tab twice and select Picture-in-Picture.
- This keeps the video playing in a small, resizable window even if you switch tabs.
Conclusion
Interruptions during Netflix ads can disrupt the viewing experience, but they’re avoidable with the right steps. From installing Chrome extensions to adjusting browser settings or manually simulating activity, there’s a solution for everyone.
Have you tried any of these methods? Share your experiences in the comments, and feel free to suggest other tips. Don’t forget to share this guide with fellow Netflix users to help them enjoy uninterrupted viewing!
I’ve been into SEO and blogging for over 7 years. I help websites show up higher on search engines. I really enjoy writing helpful guides, especially about gaming and tech stuff.
