Without having your authors set up a Gravatar, it’s practically impossible to display their images on a WordPress site using the default WordPress author box feature.
When creating their account, the authors have to do it using the same email address they supplied on your WordPress site. So in a way, you could see setting up a Gravatar, as part of the process in which you complete the information about an author on your blog.
While some of us may be agitated over this requirement, the use of Gravatar in WordPress resolves several ambiguities in displaying the images of WordPress users, especially in the comment section.
With Gravatar, authors are not the only users eligible to display their images on a post. But since Gravatar treats all users as equal, it would require additional lines of code to prioritize the author’s image on a WordPress site. This could, however, be achieved without any code if you use a plugin such as Simple Author Box. You can learn more about that by exploring the plugin’s site.
In this article, we will give you a step-by-step tutorial on how to set up Gravatar, and will also teach you what Gravatar really is and what are the benefits of using it.
So in order to avoid wasting any more time, let’s jump right into it!
What is Gravatar?
Gravatar, which stands for Globally Recognized Avatar, is a service built to provide unique avatars for individuals on the web.
The word “avatar” itself means image, figure, icon, or a photo used to represent a computer user. Avatars are often used in chatrooms, internet video games, internet forums, etc.
When a Gravatar user registers on a web application/service (that supports Gravatar) using their email address, their avatar will be automatically displayed not only to distinguish them from other users but also to allow for an easier reference to any of their existing work on the web, a feature that is very useful on blogs in particular.
WordPress, for instance, has built-in support for Gravatar, which makes it super simple to display pictures of individuals when they comment or contribute on a blog post.
A Gravatar looks very similar to the images we see next to the name of a Facebook user when they write a comment or a post. In a nutshell, it’s just like your profile picture on various web applications and social media platforms.
Benefits of setting up Gravatar
Anyone can build an online reputation by using Gravatar. This is because it helps users easily identify each other through the image on their Gravatar account.
So if you are an author on a blog or a marketer looking to gain an audience on any online/social platform, setting up a Gravatar is absolutely necessary.
So, how does one create a Gravatar?
A step-by-step tutorial on how to set up Gravatar
Creating a Gravatar is very simple and also free of charge. The following steps should help you complete that process easily and without any issues:
1. Create a Gravatar account
Go to Gravatar.com and click on the blue button labeled as “Create Your Own Gravatar”.
![]()
This will then open a registration form in which you should enter your email, unique username, and password. Once you have done that, click on the “Create your account” button located at the bottom of the form.
You can also register on Gravatar.com using your existing WordPress account by clicking on the “Already have a WordPress.com account?” option.
![]()
2. Confirm your email address
After creating your account, you’ll receive a confirmation email from WordPress asking whether you wish to activate a Gravatar account.
Click on the link supplied in the email to access your newly created Gravatar account. The link should open the “Manage Gravatars” page in a new browser tab.
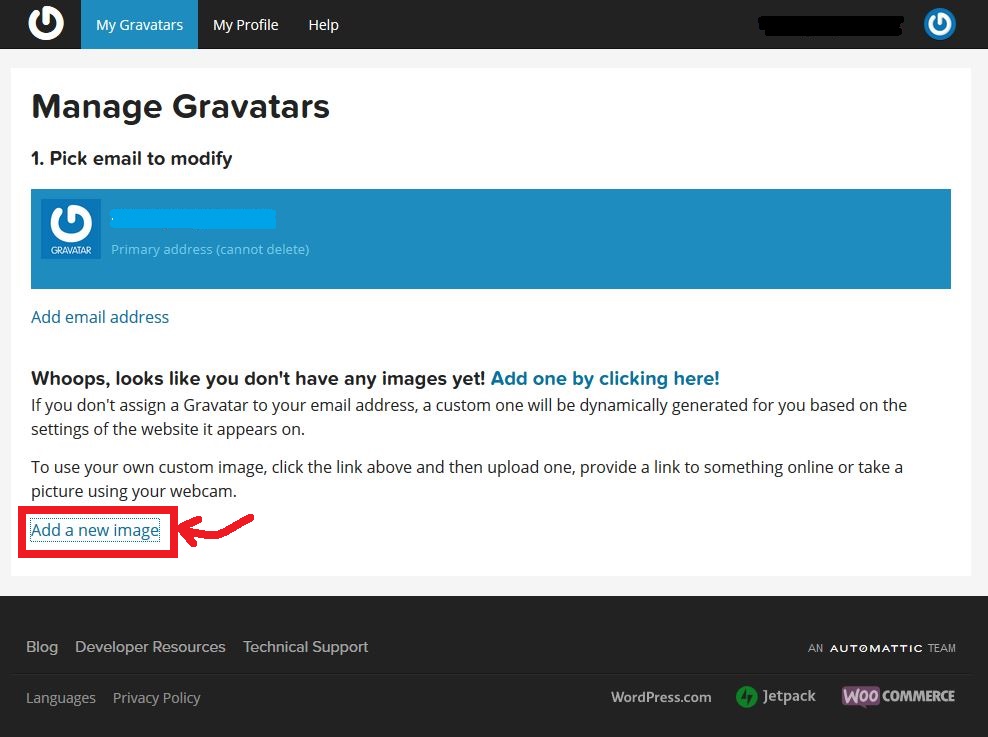
3. Set up Gravatar an image
Adding an image is usually one of the first steps to setting up a Gravatar. To do so, you will want to click on the “Add a new image” link at the bottom of the page which will enable you to upload an image from your preferred source.
The source options include images from a folder on your computer, URL, webcam, and past uploads (this last option won’t work if you have no images in your archive yet).
To upload an image from your computer, click on the “Upload new” button. This will take you to the “Upload New Image” page.
There, click on the “Choose file“ button and select the image you wish to upload through the dialog box. Now, you need to click the “Next” button and crop the image to fit an appropriate size (a Gravatar image can scale up to 80px by 80px).
![]()
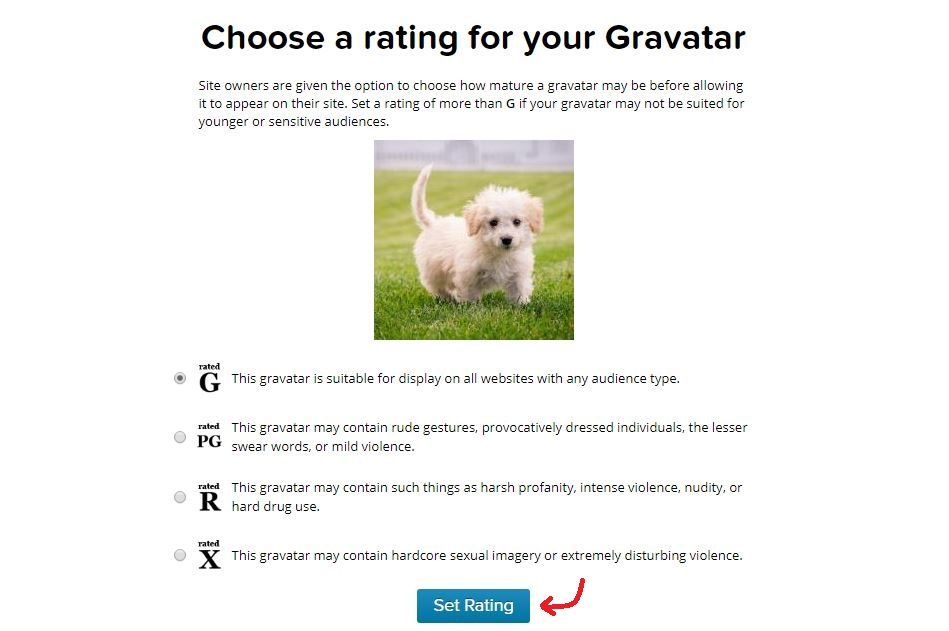
Once you finish cropping it, you will also need to choose a rating for your Gravatar image. This allows you to communicate the image’s X-rating.
The rating scale ranges from a G rating, which indicates that the image is suitable for all audience types, to an X rating which indicates that the image may contain sexual imagery or violence which some audiences might find highly disturbing.
4. Complete your Gravatar profile details
The next step in the process is to fill out your Gravatar profile details which include your full name, “about me” information, display name, location, contact information, etc.
This is done by clicking on the “My Profile” option in the top left corner of the Gravatar page. Once you fill out all the necessary information click on the “Save Profile” button at the bottom of the page.
Incorporating Gravatar images in WordPress
Since WordPress does offer full Gravatar support, the setup process for it is extremely simple and goes something along these lines.
Setting up Gravatar in WordPress
To set up Gravatar on your WordPress site, head on over to the “Settings” tab on your WordPress admin dashboard, and click on the “Discussion” option. This should then load the discussion settings page.
Scroll down to the “Avatars” section and check the “Show Avatars” box.
Next, for the “Default Avatar” setting, choose “Gravatar Logo” and click on the “Save Changes” button.
![]()
Using Gravatar in WordPress
Both authors and all other WordPress users that have a Gravatar account can display their image and other information while contributing to the platform by simply supplying their email addresses.
For instance, if you want your image to show up when you comment on a blog post, you have to enter the same email address you used when creating a Gravatar account. This way your Gravatar will automatically display as soon as you submit the comment.
For authors, a formal user registration form must be filled out through the WordPress admin dashboard before their information can be displayed, this includes their Gravatars as well.
In other words, from within the WordPress dashboard, the author’s image cannot be replaced or changed without the use of a special plugin.
Simple Author Box is one of the best plugins of this sort that lets you have lots of freedom when setting up an author box on your WordPress blog.
It will let you change an author’s image from within the WordPress admin dashboard and will provide you with many other features as well.
Setting up multiple Gravatars
Often, you will have the need to set up multiple Gravatars for different purposes. Doing this will also allow you to display images with varying PG or X ratings across different platforms, without tampering with your G-rated images on other platforms.
To achieve this goal, most people would resort to creating different Gravatar accounts using different email addresses. Well, this is completely unnecessary since Gravatar allows you to have multiple Gravatars within a single account and to have each of your images associated with a different email address.
To create additional Gravatars within the same account, these are the steps you need to complete:
- Log in to your Gravatar account and click on the “Add email address” link in the Manage Gravatars section.
![]()
- Enter the email address you wish to use for the new Gravatar and click on the “Add” button. This way, you will be able to add as many email addresses as you want.
![]()
- Click on the “My Gravatar” tab and select the email you wish to modify.
- Repeat the steps from the previous sections (which instruct you on how to set up a Gravatar) beginning at step 3 to set up Gravatar for each new email address.
Conclusion
Launched in 2007, Gravatar is one of the very first and most successful attempts to give internet users a consistent identity.
In 2010, Gravatar was serving about 20 billion images per day and within the last few years it has only grown larger in helping brands, individuals, and organizations maintain authority, trust, and identity across various platforms on the internet.
We hope that the above-described steps on how to set up a Gravatar account were clear enough to help you create your own one successfully.
Please don’t hesitate to leave any feedback or questions regarding Gravatar or this article in the comment section below!